Spotting roof damage after a storm is defined as the systematic process of identifying physical signs of wind, hail, debris, or water intrusion on your roof before those problems grow into expensive structural failures. A post-storm roof inspection is the industry term for this process, and it covers everything from a quick ground-level scan to a full attic walkthrough. Missing shingles, lifted flashing, dented vents, and water stains are the primary indicators you're looking for. Acting within 24 to 48 hours after the storm gives you the best chance of catching damage early, preventing secondary issues like mold, and building a solid insurance claim.
How to spot roof damage after a storm: tools and safety first
Before you step outside to check roof for storm damage, you need the right gear and a clear plan. Going in unprepared is how minor inspections turn into emergency room visits.
What to gather before you start:
- Binoculars (8x42 or similar): lets you examine shingles, flashing, and ridge caps from the ground without climbing
- Smartphone or camera: for photos and video documentation
- Flashlight: needed for attic inspection even during daylight
- Tape measure: useful for sizing hail dents on metal components
- Notepad or inspection app: to log what you find and where
- Non-slip shoes and gloves: if you do go up, grip matters
Safety is the first real decision you make. American Family Insurance recommends starting with a ground-level visual check before involving any professional or climbing anything. If the roof is wet, the pitch is steep, or you see visible structural damage, stay on the ground. A damaged roof can shift underfoot without warning, and no inspection is worth that risk.
Know when to call a professional. If you spot sagging sections, large areas of missing shingles, or any sign that the roof deck itself is compromised, contact a licensed roofer before going any further. French Roofing offers free roof inspections across the greater Portland metro, so you don't have to guess when the situation is beyond a DIY check.

Pro Tip: When photographing damage from the ground, place a coin or ruler next to the area you're shooting. That scale reference makes the damage size clear to insurance adjusters and contractors reviewing your photos later.
What signs of roof damage should you look for from the ground?
A ground-level inspection is the safest and most practical first step in any post-storm roof inspection. You can identify the majority of obvious damage without ever leaving your yard, especially with a good pair of binoculars.
Start by walking the full perimeter of your home slowly. Look up at every slope, ridge, and edge. Here's what to scan for:
- Missing or lifted shingles: gaps in the shingle pattern or edges curling upward are clear wind damage indicators
- Cracked or broken shingles: visible splits or fractures, often caused by hail or flying debris
- Granule loss: look in your gutters and downspout discharge areas for dark, sand-like granules; granule loss in gutters is a reliable sign of wind damage
- Dents on metal components: check vents, flashing, gutters, and chimney caps; dents in vents and flashing confirm hail impact size and often indicate shingle damage nearby
- Debris on the roof: branches, leaves, or shingle tabs sitting on the surface point to impact zones
- Sagging areas: any section of the roof that looks lower than it should is a structural concern
Use your binoculars to examine the ridge line, valleys, and areas around chimneys or skylights. These spots collect water and are the first places leaks develop. Misaligned or lifted flashing around these penetrations is one of the most common signs of storm damage that homeowners miss.
| Sign to look for | Where to check | What it likely means |
|---|---|---|
| Missing or lifted shingles | All roof slopes | Wind damage, possible water entry |
| Granules in gutters | Gutters and downspouts | Shingle surface wear from hail or wind |
| Dents on metal components | Vents, flashing, gutters | Hail impact confirmed |
| Debris on roof surface | Any slope or valley | Impact zones, possible punctures |
| Sagging sections | Ridge line and mid-slope | Structural or deck damage |
| Lifted or separated flashing | Chimney, skylights, valleys | Water intrusion risk |
If you're unsure whether what you're seeing is storm damage or normal wear, a roof inspection before repairs by a licensed professional will give you a clear answer and protect your claim.
How to inspect your attic and roof surface for hidden damage
Some of the most serious storm damage never shows up from the outside. Water can enter through a small breach in flashing or a cracked shingle and travel several feet before it becomes visible. That's why checking your attic is a non-negotiable part of how to inspect roof after storm.
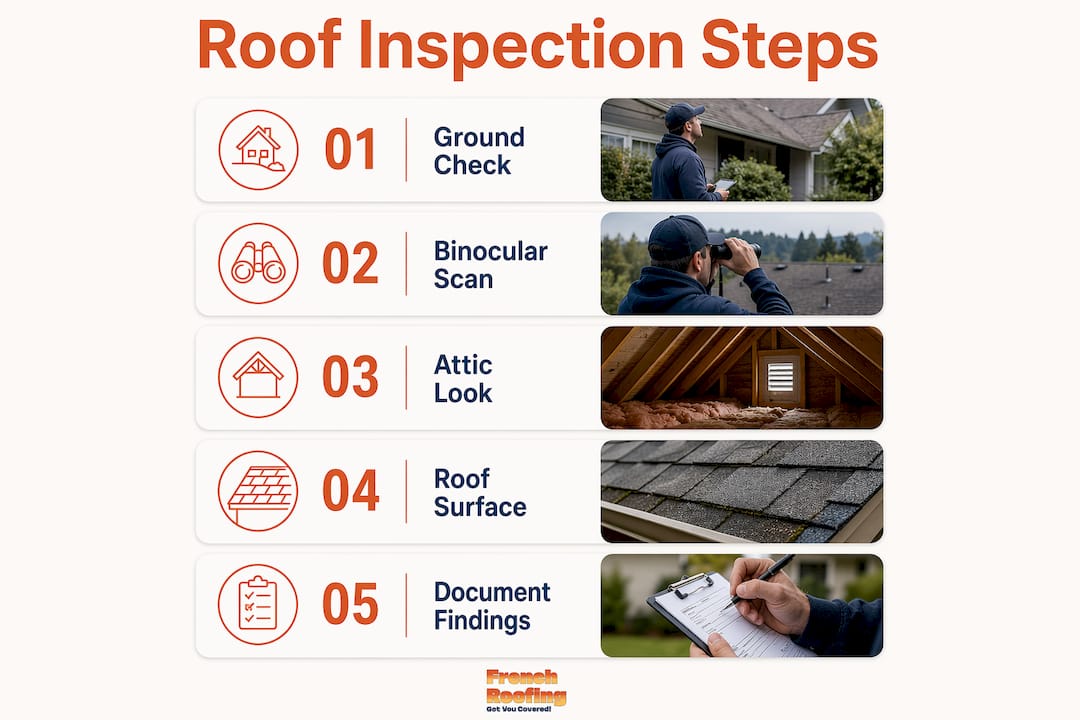
Go into your attic during daylight with your flashlight. Turn the flashlight off for a moment and look up at the roof deck. Water stains, damp insulation, and daylight through the roof deck are the three clearest signs of a breach. Any pinpoints of light mean there's a hole, and that hole is letting in both water and air.
What to look for in the attic:
- Water stains or dark streaks on rafters and sheathing
- Damp, compressed, or discolored insulation
- Visible daylight through the decking
- Musty or mildew odors (mold can begin developing within 24 to 48 hours of water intrusion)
- Soft or spongy spots on the decking when pressed gently
If conditions are safe and your roof pitch allows it, a direct surface inspection adds another layer of detail. Walk carefully on dry sections only, wearing non-slip shoes. Look for shingles that feel soft or spongy underfoot, cracked sealant around pipe boots and vents, and any flashing that has lifted or separated from the surface it's meant to seal.
Pro Tip: If you smell something musty in your attic even without visible water, check the insulation directly. Wet insulation compresses and loses its shape. Running your hand across it takes five seconds and can tell you more than a visual scan alone.
Understanding structural roof repair becomes relevant quickly when attic damage points to compromised decking or rafters. That's a job for a licensed contractor, not a weekend project.
How should you document storm roof damage for insurance?
Documentation is where a lot of homeowners lose money they're rightfully owed. Insurance adjusters work from evidence, and the stronger your evidence, the smoother your claim. Early photography within 24 to 48 hours is the single most important step you can take after identifying damage.
Here's how to build a documentation package that holds up:
Photo strategy:
- Wide shots of each roof slope showing the full extent of damage
- Close-ups of individual damaged shingles, dents, or lifted flashing, with a coin or ruler for scale
- Photos of undamaged areas on the same roof. Photographing undamaged sections alongside damaged ones helps adjusters distinguish storm damage from pre-existing wear, which reduces disputes
- Interior attic photos showing stains, wet insulation, or daylight
Video walkthrough: A narrated video walkthrough covering each slope and interior area gives adjusters clear context that photos alone can't provide. Speak clearly as you record, naming the location and describing what you see.
Supporting records:
- Note the date, time, and weather conditions at the time of inspection
- Save any local storm reports, weather service alerts, or news coverage from that day
- Keep a written log of every inspection step, including who was present
| Documentation method | Best use | Benefit |
|---|---|---|
| Wide-angle photos | Full slope overview | Shows scope and pattern of damage |
| Close-ups with scale | Individual damage points | Confirms size and severity for adjusters |
| Photos of undamaged areas | Comparison baseline | Separates storm damage from wear |
| Narrated video | Full walkthrough | Provides context and location detail |
| Written log with date/time | Record keeping | Establishes timeline for claim |
| Storm reports | Supporting evidence | Confirms weather event occurred |
Understanding why insurance denies roof claims before you file helps you avoid the most common documentation mistakes that lead to denials.
Common mistakes to avoid when checking for storm damage
Even homeowners who take inspection seriously can make errors that cost them time, money, or their insurance claim. These are the ones French Roofing sees most often.
- Climbing on a damaged or wet roof alone: a wet or structurally compromised roof is unpredictable. If you must go up, bring someone who can call for help if needed, and only do so when the surface is dry and stable.
- Waiting more than 48 hours to inspect: secondary damage like mold, rot, and water-damaged insulation can develop fast. A timely inspection within 24 to 48 hours preserves evidence and limits how far damage spreads.
- Making permanent repairs before the adjuster visits: insurance companies expect to inspect damage before permanent repairs are made. Patching or replacing materials first can result in a denied claim. Temporary tarping to prevent further water entry is acceptable and expected.
- Ignoring interior water signs: a dry-looking roof from outside can still have active leaks. Skipping the attic check means missing damage that's already spreading.
- Taking unclear or manipulated photos: blurry, poorly lit, or staged photos raise red flags with adjusters. Shoot in good light, keep the camera steady, and document what's actually there.
Each of these mistakes is avoidable with a little preparation and patience. The inspection itself takes an hour or two. The consequences of skipping it can take months to sort out.
Key takeaways
A systematic post-storm roof inspection, starting from the ground and moving to the attic, combined with prompt documentation within 24 to 48 hours, is the most effective way to protect your home and your insurance claim after severe weather.
| Point | Details |
|---|---|
| Start from the ground | Use binoculars to scan for missing shingles, dents, and lifted flashing before climbing anything. |
| Check the attic too | Water stains, damp insulation, and daylight through the deck reveal hidden breaches invisible from outside. |
| Document within 48 hours | Wide photos, close-ups with scale, and a narrated video give adjusters the evidence they need. |
| Photograph undamaged areas | Showing intact sections alongside damage helps distinguish storm impact from pre-existing wear. |
| Avoid permanent repairs first | Let the insurance adjuster inspect before you fix anything; temporary tarping is fine. |
What I've learned from years of post-storm inspections
Here's something I tell every homeowner I talk to after a big storm: the damage you can see from the ground is usually not the whole story. I've been on roofs where the shingles looked fine from the street and the attic told a completely different story. Water stains on rafters, insulation that had been wet for days, a small gap in flashing around a chimney that nobody noticed. That's the stuff that turns a $500 repair into a $5,000 problem.
The other thing I've noticed is that homeowners who document early and thoroughly almost always have smoother insurance experiences than those who wait. It's not about gaming the system. It's about giving the adjuster what they need to do their job. A clear photo with a ruler next to a hail dent is worth more than a week of phone calls.
My honest advice: do the ground check yourself, go into the attic with a flashlight, take your photos, and then call a professional before you make any decisions about repairs. You don't have to figure out the full scope of damage on your own. That's what we're here for.
— Sean
French Roofing is ready to help after the storm clears
After a storm rolls through Damascus, Clackamas, Happy Valley, or anywhere in the greater Portland metro, French Roofing is the team your neighbors call. We're a family-owned, CertainTeed Certified roofing company (CCB #203933) that has been serving this area since 2014.
We offer free professional roof inspections so you can get a clear, honest assessment of what the storm actually did to your roof without any guesswork. If repairs are needed, our roof repair services cover everything from a few replaced shingles to full flashing restoration. And if the damage turns out to be more serious, we'll walk you through your options without any pressure.
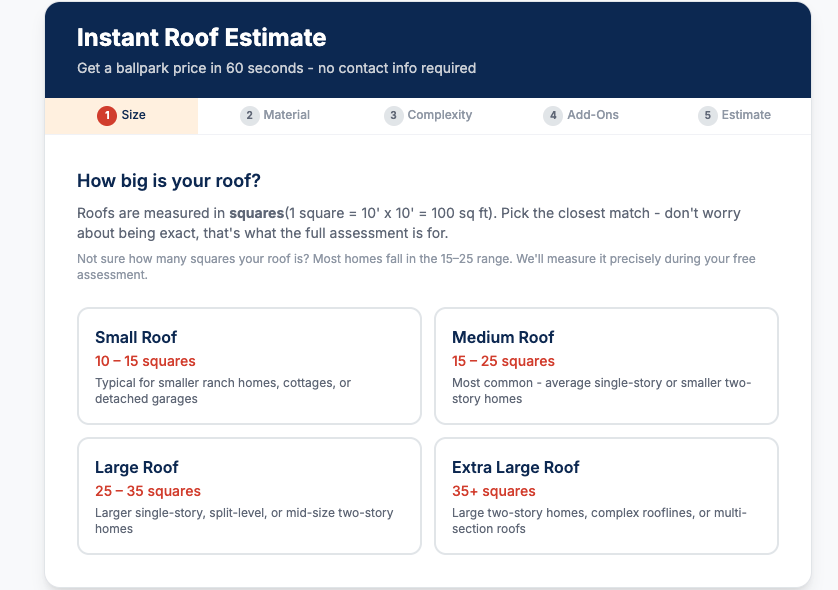
Get Instant Estimate Online!
FAQ
How soon should I inspect my roof after a storm?
Inspect your roof within 24 to 48 hours after the storm when it's safe to do so. This window preserves evidence for insurance claims and limits secondary damage like mold or rot from spreading.
What are the most obvious signs of roof damage after a storm?
Missing or lifted shingles, granules collecting in gutters, dents on metal vents and flashing, and visible debris on the roof surface are the clearest indicators of storm damage.
Is it safe to climb on my roof to check for damage?
Only climb on your roof if the surface is dry, the pitch is manageable, and you have someone with you. In most cases, a ground-level check with binoculars and an attic inspection will reveal the key damage without the added risk.
Can I make temporary repairs before the insurance adjuster arrives?
Temporary measures like tarping over a damaged area are acceptable and expected to prevent further water entry. Avoid permanent repairs until the adjuster has inspected and documented the damage, as repairs made beforehand can lead to a denied claim.
What if I don't see any damage from the ground?
A clean-looking roof from the street doesn't rule out damage. Check your attic for water stains, damp insulation, or daylight through the decking. Hail damage to shingles is also often subtle and best confirmed by a licensed roofing professional.